The straddle straight arm press to handstand is one of the most rewarding calisthenics skills you can learn. It looks effortless when done well, but it takes real strength and flexibility to get there. These are the five exercises that helped me learn it, and I believe they can help you too.
What Is a Straddle Press to Handstand?
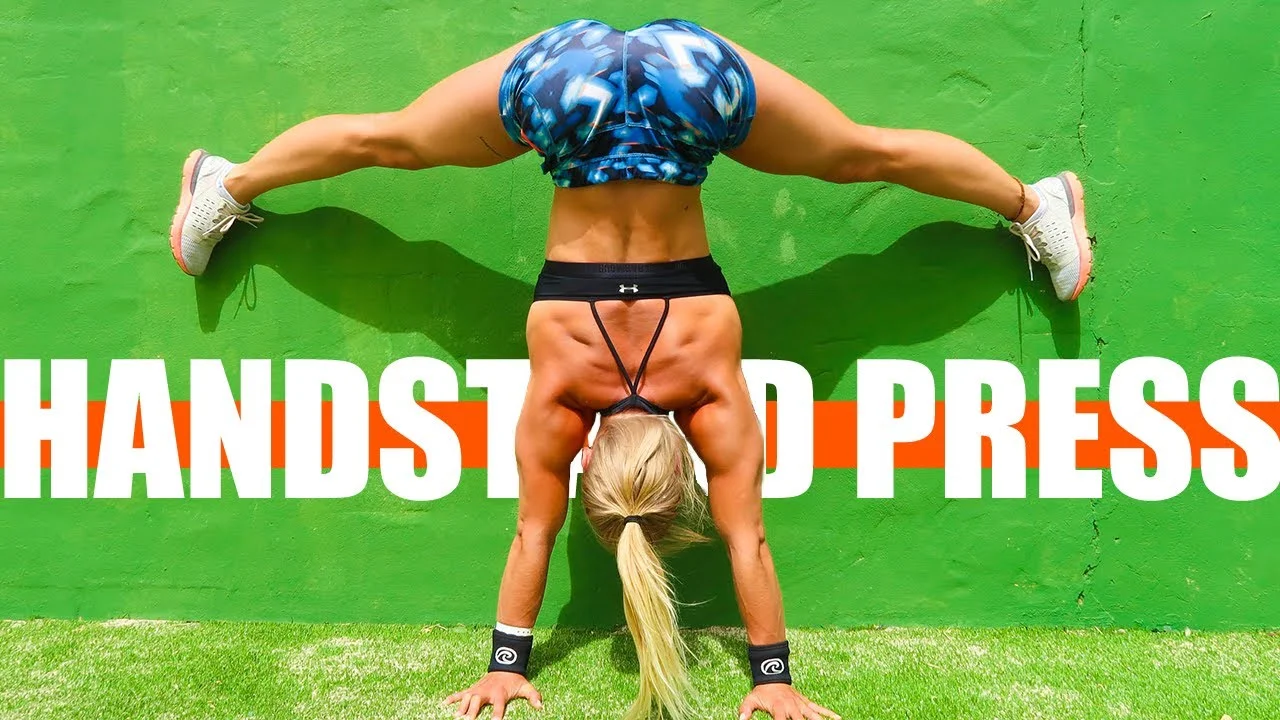
A straddle press to handstand is when you lift yourself from the floor into a handstand with straight arms. Your legs stay wide in a straddle position as they travel up. There is no kicking, no jumping, just controlled strength and balance.
It is one of those skills that truly shows your body control. You need hip flexor strength, shoulder stability, core compression, and hamstring flexibility. It sounds like a lot, but you can build all of it with the right progressions.
Prerequisites Before You Start
Before you dive into press training, you should be comfortable with a few things first.
You need a solid freestanding handstand or at least a consistent wall handstand. Holding for 20 to 30 seconds against the wall is a good baseline. You should also have decent hamstring flexibility. If you can not touch your toes comfortably, spend some time stretching first.
Basic core strength matters too. If planks and hollow body holds feel challenging, build that foundation before adding press work. The press demands a lot from your body, so prepare it properly.
The 5 Steps to Your First Handstand Press
Step 1: Seated Straddle Leg Raises
This is where it all begins. Sit on the floor in a straddle position with your hands placed between your legs. Press into the floor and lift your legs as high as possible. Keep your upper body still.
This exercise targets your hip flexors, which do a huge amount of work during the press. The further forward you place your hands from your body, the harder it gets. Start easy and progress from there.
Aim for 3 to 4 sets of 8 to 12 reps. Focus on controlled lifts, not speed.
Step 2: Negative Straddle Press with a Friend
For this one you need a training partner. Kick up into a handstand against the wall. Place your hands slightly away from the wall so your shoulders lean forward. Your shoulder blades should stay in contact with the wall.
Now straddle your legs, tighten your core, and lower yourself down as slowly as you can. Your friend catches you and pushes you back up against the wall. The lower on your stomach they hold, the more assistance you get.
Negatives build eccentric strength, which is key for controlling the press movement. Do 3 to 5 sets of 3 to 5 slow negatives.
Step 3: Negative Press on Your Own
Once the assisted negatives feel manageable, try them solo. Kick up against the wall, straddle your legs, and lower down on your own. If you can not press back up yet, that is completely fine. Just kick up and repeat the negative.
If straddle negatives become too easy, bring your legs together for a pike negative. That makes it significantly harder.

Step 4: Hip Lifters on Boxes
This exercise is great for activating your lower back and glutes. You need two boxes or sturdy elevated surfaces. Place your shoulders on the boxes with your head hanging between them.
Press your shoulders and hands down into the boxes. Lift your legs from the ground up into a shoulder stand position. Start with bent legs to make it easier. When that feels comfortable, straighten your legs and press up with control.
This drill teaches you the feeling of lifting your hips over your shoulders, which is exactly what happens in a full press. Do 3 sets of 5 to 8 reps.
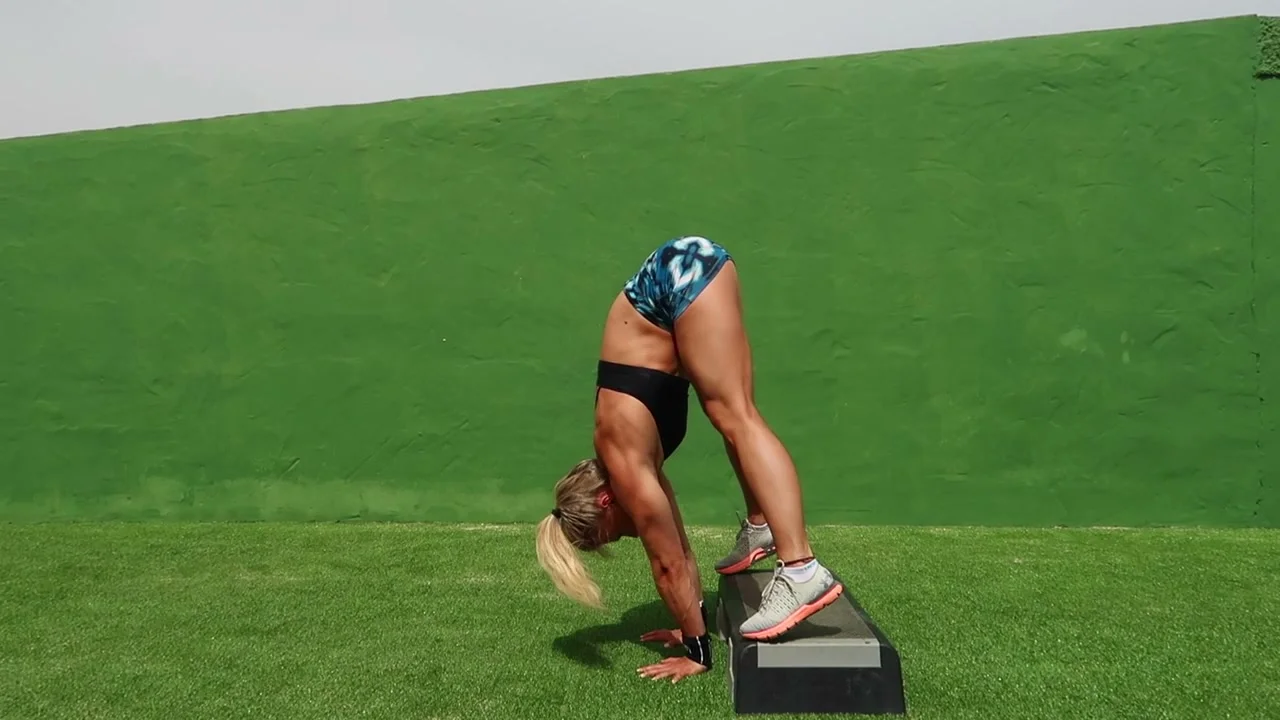
Step 5: Straddle Press with Feet on a Height
This is the closest progression to the real thing. Place your feet on weight plates, a step, or any low platform. Put your hands on the floor as close to the platform as possible.
The elevation gives your hips a head start, making it easier to stack them over your shoulders. Lean your shoulders forward, press hard through the floor, and let your feet lift off. From there, press all the way up.
As you get stronger, lower the height of the platform until your feet are on the floor. That is your full press.
Common Mistakes to Avoid
Rushing the progressions. Each step builds on the last. Skipping ahead usually means you lack the strength to control the movement. Be patient with yourself.
Forgetting to lean. The shoulder lean is essential. If your shoulders stay stacked over your wrists, your hips can not travel forward enough. You need that forward lean to shift your center of gravity.
Holding your breath. Breathe. It sounds simple, but people tense up and forget. Exhale as you press up. It helps engage your core.
Ignoring flexibility. This is a big one. The press becomes so much easier when you have good hamstring, hip flexor, and lower back flexibility. Stretch consistently. It makes a real difference.
Training Tips for Faster Progress
Train the press 2 to 3 times per week. More is not always better with skill work. Your body needs time to recover and adapt.
Always warm up your wrists, shoulders, and hamstrings before pressing. Cold joints and tight muscles do not cooperate.
Film yourself. Seriously. Watching your form on video reveals things you can not feel in the moment. Compare your technique to the progressions and adjust.
Combine press training with regular handstand practice. The stronger your handstand, the more confident you will feel at the top of the press.
If you want a structured approach to your handstand training, I have a full Handstand Program that covers everything from basics to advanced skills.
The Role of Flexibility
I want to emphasize this because it matters so much. The three areas you need flexibility in are your hamstrings, lower back, and hip flexors. When these are open, your body can fold tighter in the compression phase. That means less strength is needed to lift your hips.
Spend 10 to 15 minutes stretching these areas after every session. Pancake stretches, pike stretches, and hip flexor lunges are your best friends. Consistency beats intensity when it comes to flexibility.
Frequently Asked Questions
How long does it take to learn the straddle press to handstand? It depends on your starting point. If you already have a solid handstand and decent flexibility, it could take a few months. Starting from scratch, expect 6 to 12 months of consistent work. Everyone progresses differently.
Can I learn the press without a wall? You can, but the wall is a helpful tool for negatives and building confidence. I recommend using it, especially for steps 2 and 3.
Should I learn straddle press or pike press first? Straddle press is easier because your legs are spread wide, bringing your center of mass closer to your hands. Start with straddle and progress to pike later.
What if I do not have a training partner for step 2? You can skip straight to step 3 and focus on solo negatives. Just go extra slow and controlled. The wall will catch you.
Do I need to be able to do a straddle L-sit first? It helps, but it is not strictly necessary. The leg raises in step 1 build similar strength. If you can hold a straddle L-sit, you are in a good place to start press training.
How important is the shoulder lean? Very. Without leaning your shoulders past your wrists, you will not have the leverage to lift your hips. Practice the lean in your regular handstand work so it feels natural.
These five exercises are exactly what got me to my first straddle press. Work through them step by step, stay consistent, and trust the process. You will get there. Good luck, and let me know how it goes!